 How to Loom Knit a Hat- Easy
Learn how to loom knit the basic hat is almost fail-proof with a circular loom. To top that off your supply list is made-up of only five items, a loom, a hook, yarn, a yarn needle and scissors making loom knitting an affordable project that will serve you well many times over.
Once you know this simple project a lot of the others you will find on this site are just adjustments of the basic loom knit hat.
Follow the links below for picture and text tutorials.There is a video tutorial as well if that is of your preference.
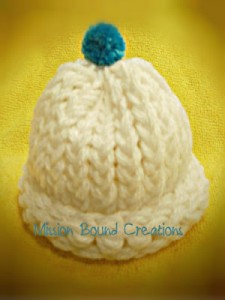
Important Note – For the hat in the picture – just turn your basic loom knit hat inside out.
Supplies Needed: Loom (See Guide for Size), Heavy (Worsted) Yarn , Yarn Neel, Hook, Scissors
—————————————————————————————————
Loom Size / Hat Size
Size Chart is based on Averages. The information is only a recommendation. Please use your own judgement in the final decision.Note: Rows are based on 1 strand of thick yarn or 2 strands of light or medium weight yarn, e-Wrap Stitch and No Brim.
Chart Update: 10/2014
For a Folded Brim you may need 6 - 18 rows depending on the recipient. Note that to make the brim you fold the knitting in half.
1 inch = 2.54 centimeters
| Hat Recipient | Avg Head Circumference | Loom Size | Hat Length | Number of Rows |
|---|---|---|---|---|
| AG Doll | 11 in / 27 cm | Sm 24 Pegs | 4 in | 20 |
| Preemie | 12 in / 30 cm | Sm 24 Pegs | 4 - 5 in | 20-25 |
| Newborn | 14 in / 36 cm | Sm 24 Pegs | 5 - 6 1/2 in | 25-30 |
| Baby - 1 yr. | 18 in / 46 cm | Md 31 Pegs | 7 in | 25-30 |
| Toddler | 21 in / 53 cm | Lrg 36 Pegs | 7 in | 25-30 |
| Tweens & Teens | 22 in / 56 cm | Lrg 36 Pegs | 8 in | 30-34 |
| Women & Lean Men | 22 in / 56 cm | Lrg 36 Pegs | 8 - 9 in | 32-40 |
| Lrg Women & Men | 24 in / 61 cm | X-Lrg 41 Pegs | 9 -10 in | 38-45 |
.
The Pattern: How to Loom Knit a Hat Easy
.
Note: If you have a large gauge loom like the Knifty Knitter, Darice or Boye you should use two strands of yarn as 1 for a nice tight stitch.
Leave a 1-2 inch tail on your working yarn for a knot.
Size: My formula for rows is 4 rows per inch
Start the Hat
1. Make a (slip) knot. Place it on your anchor peg. ( the lonely peg outside of your loom )
2. (Cast on) Wrap all the pegs twice. This should give you 4 strands per peg.
3. (Knit) With your hook – flip the bottom two strands over and behind the top two. Continue around the whole loom. You will be left with two strands on each peg.
At this point you can – Release the working yarn from the anchor peg. – You finished 1 row !
4. Repeat steps 2 and 3 until you have your desired length. Average adult is 38 rows. See size chart below.
For a Brim: When you start your hat – knit twice the length (height) that you want you brim. Then fold your knitting from the bottom. Grab the bottom rim (should be a bit curled up) place one loop on each peg. Then with your hook (Knit) – flip the bottom two strands over and behind the top two. Continue around the whole loom. You will be left with two strands on each peg. Now you can start knitting the hat using steps 2-4
To Close the Hat: (Gathering Method) : Using your working yarn measure out about 12 to 15 inches and cut the yarn. Thread your yarn needle with that yarn tail. Feed the needle through the first peg. Left the yarn loop off the peg. It will gather to the side of your work. Continue all the way around the loom. Until your work comes off the loom.
YOU’RE DONE!
 If you want to make a Pom Pom for your hat and learn how to attach it the easy way I wrote an article with 6 different technique for making pom poms. You can use a tool you can purchase on line or at most discount stores or you local craft store.
The methods also range from just using you hand to the more free and earth friendly method of using left-over card-board.
You might even get some great craft ideas for things you can make with all your new and cute pom poms outside of just learning How to Loom Knit a Hat Easy. Everything from a pom pom critter to a new scarf. For all the information: Click Here
Video Tutorial: How to Loom Knit a Hat EASY
I always recommend that you watch the video from beginning to end before starting the project. You will find that you will be easier and you will feel more confident.
.
How to Loom Knit a Hat EASY – 3 Parts
Click the links below to find text and picture tutorials. I have separated the lesson into three parts not because of difficulty but for the purpose of reference. Most people get stuck on one part of the lesson and need to easily return.
1. Start the Hat 2. Make the Brim 3. Close the Hat
For a Video Tutorial of Adult Hat : Click Here
.
Video: How to Loom Knit a Hat Easy – BABY
Sometimes the person needing the hat is tiny. Below is a video that will teach you how to knit a hat easy for a newborn. It is extremely easy and you will find that you can complete this project is a short time. This is one of my favorite hats to make because there are so many opportunities for giving them away.
Below are just a few things that you can make once you learn how to loom knit a hat.
Related Posts
Tagged: beanie, boy, child, girl, knit hat, loom a hat, loom knitting, man, yarn crafts











THANK YOU! It was a rainy day today and I remembered I had a round loom that I wanted to learn how to use…can’t wait to try more stuff! Your tutorial was perfect.
Thank you Emma !
how do you knit a name on a hat?
You would need to use two colors and a layout of your letters as you would do with cross stitch – here is a link to a great video: Click HERE It’s called “INTRASIA”
Hi, just made my first hat using your video. Thank you so much.
Now I’m starting a new one, on the large loom. I’m a little confused on the rows. Does the 38-45 include the brim rows? Or is that an additional 16 rows. I don’t have a tape measure, so I have to count rows. Thank you, Dawn
Dawn – that would be the total rows for just a straight hat with out a brim. As you watch the video you will see that I separate the counting of the brim because it does take additional math because that fabric is folded and so you have to knit twice the amount of rows. Note the example math for 2 inch brim ( the average width ) . I know this sounds crazy but to put the brim within the 38-45 rows you wouldn’t count that number of rows that are folded inward. So if you knitted a 2 inch brim you would need 16 rows (2×4)x2 but 8 rows are folded – so it counts as 8 of the 38-45 – hope that makes sense. 🙂
Let me know if it didn’t
Fantastic I finished my hat and it looks great. Thankyou Loomahat.com
only have 40 loops when i should have 41
When i got to the part to do the brim i began looping it back on but there is one peg the has nothing to loop onto it
Check the one right next to the first peg. Sometimes it comes off the loom while you’re doing the other ones and the loop shrinks making it hard to see it
correction 66-year old – hahaha
Diagonal textured pattern>> 666-yr-old male, started with dozens of chemo-caps, needed SIMPLE variation and found it. After making a brim, the pattern is
> > 2 pegs no-wrap, then 2 pegs e-wrap!! On a 41-peg loom, a textured ‘spiral results from the sets of 4.
I have photos of the stitch and the resulting hat, and wish to share them as well.
YES PLEASE ! You can post them on our Facebook page or Email them to me denise@loomahat.com
Thank you so much! I have just learned of loom knitting and your instructions and pattern are great.
You are welcome!
really nice article, thanks for them good post.
i became a regular follower of your blog. thanks for all the good info.