Double Basket Stitch Pattern for the Knitting Loom
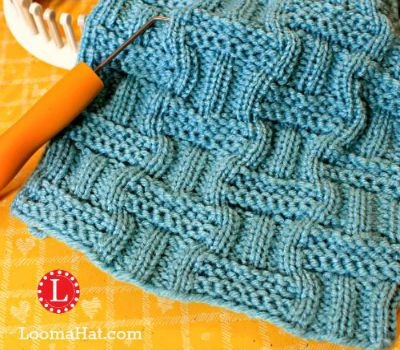
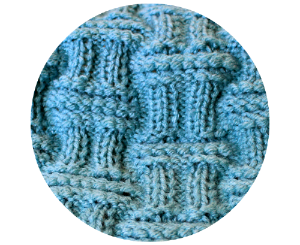
This rich and interesting stitch is a mix between a rib and a basket weave stitch. Below is the FREE pattern for the Flat versions and a step by step video tutorial.
For both the flat and round version click HERE to purchase the PDF.
I have to admit that translating it was no fun but once it was done I was tickled pink with joy. I do want to give you a heads up although this design is made up of only knits and purls it can easily get confusing so it’s best to try it only if you are at a minimum an advanced beginner loom knitter or you’re really bold and focused. Pen and paper or stitch counter is highly recommended.
Another warning, it requires a lot of stitches and a lot of rows. You will need 18 stitches across and 20 rows to get the complete pattern and that doesn’t include the edges if you plan to knit the Flat version. A small 4×4 inch square will take you 20 stitches and 60 rows. Can you imagine a scarf. But it would surely be BEAUTIFUL !
Lets Talk Patterns
Notes: Below is the pattern. The change in font color is only to make this 20 row pattern easier to follow. Use the U-wrap version of the knit stitch. I did a e-Wrap cast-on and added only 2 knit stitches for edges.
Loom: Use a small gauge loom. I used the KB Adjustable Hat Loom
Yarn: Any yarn will work. I was actually testing this stitch and used Red Heart Super Saver
To Make an 8×8 Square repeat the double basket stitch 2 times with 2 knit stitches (total of 40 stitches) add the edges and knit 119 rows. End with modified basic bind-off.
.
.
.
Patterns: Double Basket Stitch
.
The flat pattern is FREE on this website. To Purchase a Printable PDF of both the flat and round versions: CLICK HERE
LOOM USED FOR SAMPLE: KB Adjustable Hat Loom
Flat Version
Multiples of 18 plus edges
20 Stitches and 60 Rows = 4 inches (10.16 x 10.16 cm)
> Row 1: k11, p2, k2, p2, k1
< Row 2: k1, p2, k2, p2, k2, p8, k1
> Row 3: k1, p8, k2, p2, k2, p2, k1
< Row 4: k1, p2, k2, p2, k11
> Row 5: k11, p2, k2, p2, k1
< Row 6: k1, p2, k2, p2, k11
> Row 7: k1, p8, k2, p2, k2, p2, k1
< Row 8: k1, p2, k2, p2, k2, p8, k1
> Row 9: k11, p2, k2, p2, k1
< Row 10: Knit
> Row 11: k2, p2, k2, p2, k10
< Row 12: p8, k2, p2, k2, p2, k2,
> Row 13: k2, p2, k2, p2, k2, p8
< Row 14: k10, p2, k2, p2, k2
> Row 15: k2, p2, k2, p2, k10
< Row 16: k10, p2, k2, p2, k2
> Row 17: k2, p2, k2, p2, k2, p8
< Row 18: p8, k2, p2, k2, p2, k2
> Row 19: k2, p2, k2, p2, k10
Row 20: Knit
Learn the Double Basket Stitch with a Video
The video goes through each row so it is a long video when compared to my other stitch videos. It has captions in case you don’t like hearing music while you work on your pattern.
YouTube Subscription: Click HERE
Stitch PlayList: Click HERE
Stitch Pattern Page : Click HERE
.
Video









I’ve never been able to figure out how to knit in all my nearly 40 years. My little sister can do it brilliantly, a talent I simply don’t have. I can crochet, but knitting I have never been able to figure out. Our parents gifted me with a set of knitting looms for Christmas and I am so excited to try them! Your site is such a gem and full of such great information. I feel like I finally understand what to do!
Of course I have to fall in love with the most complicated stitch you show. I want my first project to be a pretty cowl/head cover. I feel almost confident enough with your tutorial that I can do it!
Thank you so much for putting this information and your talents out there for the rest of us to learn from! I will definitely be a frequent visitor!
Welcome to the family ! Let me know if you have any questions.
going to give this a try! Only going to do one set and put on edge border. What do you think of a seed stitch side edge?
That is one of my FAVORITE edges. Just takes a lot of focus. PLEASE send pictures when your done. Would so love to see that. This is my email denise@loomahat.com and let me know if I can share it with the folks here and the Facebook family. 🙂
You start first on the left then stop halfway,then you start on the right and stop halfway are you cutting your yarn each time when you reach halfway point.
Hi Iceman, at the beginning of the video I explain that I repeat the stitch. I wanted to end with an 8×8 square. To complete this project I needed to do the stitch pattern twice but I didn’t want to explain each row twice which have made the video almost an hour long. Notice that I start with a red rubber band and return on a purple.
Hope this helps to explain 🙂
Was my question deleted? If so, why?
Opps, there it is! 🙂
I’m so excited to try this! Have you attempted out with 2 yarns as 1? Just wondering if it would be too thick with the smaller gauge. Thanks!
Hi Christine, I wouldn’t recommend it. You don’t need 2 strands with the small gauge. I think a bigger problem then just the way it looks – is the knitting process. Will be way tight and get tighter as you progress. Plus you’re using more yarn then necessary.
Thanks so much for the gorgeous pattern! I would love to try this on a hat. I usually use the KB Adjustable Hat Loom at 68 pegs. Would this pattern work on that in the round? If the stitch pattern is 18 stitches (pegs), repeating it 3 times uses 54 pegs and 4 times is 72 pegs. I’m not sure how that would work. Or maybe I’m figuring it all wrong!…lol
Thanks for your help! 🙂
Hi Carol, I’m working on a hat pattern with this stitch for the AHL right now. But won’t be ready for several weeks. I would suggest that you either add a simple stitch pattern in between like 2 knits or 2 purls or end with a partial pattern .
Hope that helps. And stay tuned for the Double Basket Stitch Hat ……
The video is confusing. Are you using 2 balls of yarn? Does this continue on all the pegs? It is a pretty pattern and I would like to use it but it needs to be explained better.
Hi Carmen, remember that this video is only for the stitch and done only once . About your question on the number of pegs, at the beginning of the video I tell you that I’m repeating the pattern – that’s why I change the color of the rubber band from red to purple. The stitch pattern is 18 stitches (pegs) I cast-on 40 – 2 stitches as edges (4 pegs) and the stitch pattern is done twice (18+18 =36 pegs). When I’m going to the right I stop half way – not to repeat the pattern on the video – same when going to the left – that would be more confusing.
I’m only using 1 strand of yarn.
Hope that helps