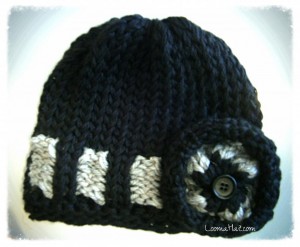
 Loom Knit Hat: Belt Loop
The loom knit hat pattern for the Belt Loop Hat is now FREE for personal use only. It is a simple yet elegant knit hat. There is a hint of the Roaring Twenties. The key to this hat is to use two different types of yarn. One that is bulky and a bit rough and one that is smooth and silky.
Scroll down to see the HIS version as well as a slouchy version of the hat. For the Flower Pattern (Made with 24-Peg Loom ) : Click Here
I hope you like this pattern. If you use it PLEASE send pictures to share here and consider making some for donation.
Loom Knit Hat – Belt Loop Pattern
The Supplies
Click the image to buy any of the supplies listed here:
.
A Trick I Used
It’s difficult for me to stay on track. I have mild ADD. Anything that pops into my head takes precedence over what ever I’m doing or suppose to be doing. I have to use tools that let me know where I left off.
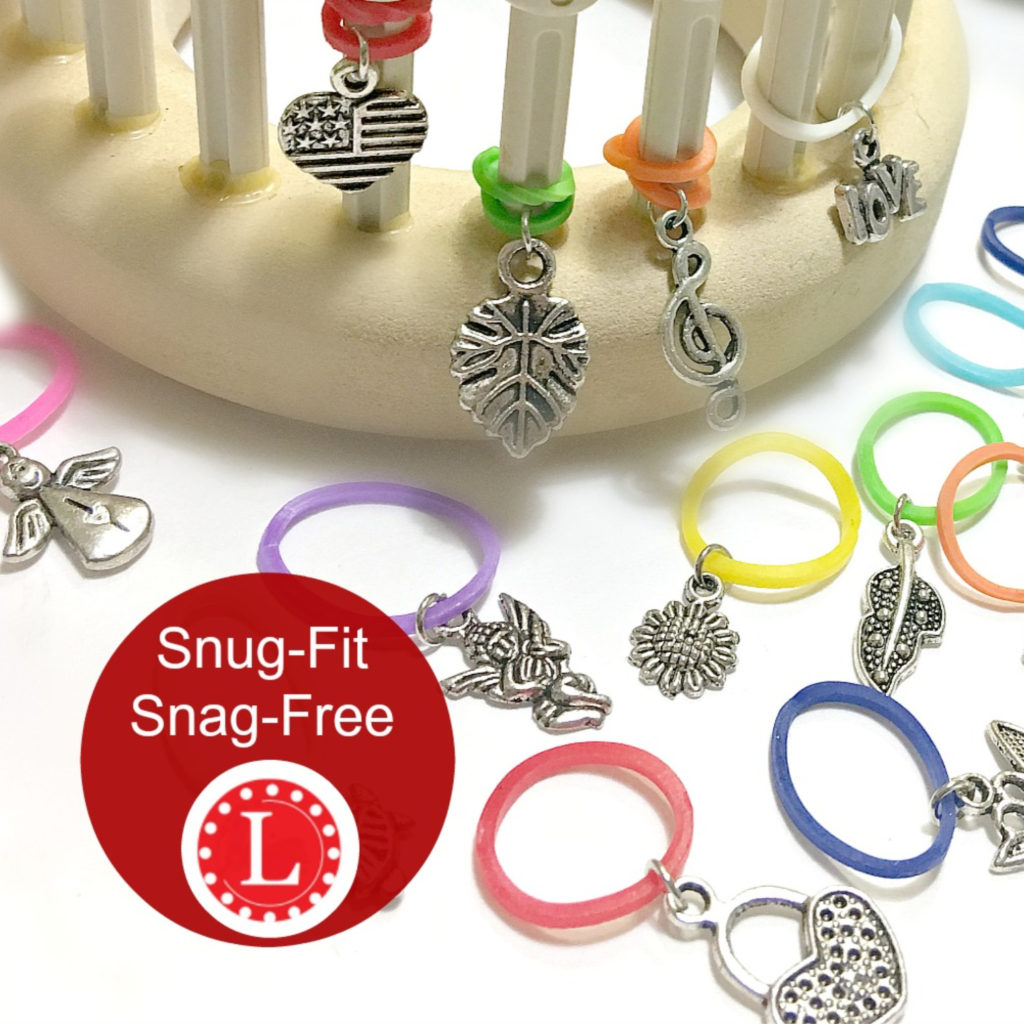
I used these white replacement pegs to keep up with my pattern. I knitted on green and purled on white.
I wrote a short article on these little guys: Click Here
Yarn Note: Must get yarns with different textures to get the loopy look for the purl stitch.
Below is what I used
…. Caron: Simply Soft – Medium 4 – Black
…. Lion Brand: Vanna’s Choice – Medium 4 Grey Marble
Loom: I used Knifty Knitter 36-Peg green round loom – But the next step higher is a better choice for an adult. Especially if you want to tidy up the loose yarn on the reverse side.
A Stitch Counter
It’s a good idea to use a stitch counter. If you are like me I often get distracted by my kids or just regular everyday task. This little $2 (with Free Shipping) tool helps me stay on track. I Love It! I did a product review, to read it Click Here
I could use an iPhone app – but I don’t want to mess with my $600 phone.
For more information on this product Click Here .
.
The Pattern
.
The Pattern is FREE on this website. To Purchase a Printable PDF Version: Click HERE
Skill Level: Intermediate
Stitches: Knit (e-wrap) , Purl ( for a Video Tutorial of knit and purl Click Here )
Start with the smooth textured yarn. Use two strands of yarn as if they were one. Wrap all your pegs.
Brim : Garter Stitch
Row 1: Knit
Row 2: Purl
Row 3: Knit
Row 4: Purl
Row 5: Knit
Row 6: Purl
Note: Do more rows if you want a wider Garter Stitch Border. You can even do as much as double and go up to 12 rows.
.
Hat Belt: Double Rib Stitch
Note: Use the smooth yarn when you knit and the rough textured yarn when you purl.Always take your working yarn behind the pegs and pull it hard when you switch colors.
Rows 7 – 9: ( Main Color – Smooth ) Knit 2, Purl 2 until the end of the round
Rows 10 -16: Knit 2 pegs with smooth yarn , Purl 2 pegs with rough yarn. Repeat pattern til end of round.
Top of the Hat: Knit Stitch
Rows 17 – 30 (?) See Notes Below: Knit to desired length ( about 4 – 6 rows for every inch depending on your yarn and loom).
Note: Most children would be between 26 – 28 rows using the 36-peg round loom.
Most adult hats for men or women would be 31 – 40 rows using the 36-peg round loom.
You can also use the 41- peg large round loom.
The 40 rows will give you more of a slightly slouchy look then the 32 rows.
.
Close the Hat
I used the Gathered Method.
Here is a Really Great Way to close your hat by Jeannie Phillips: Click Here
The Flower Pattern : Click Here
HIS Belt Loop Hat
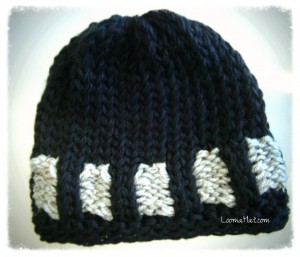 Loom Knit Hat: No Flower
Here is the hat minus the flower. You can also add a round Belt Buckle to really give it a belt look or even a feather. This can also be the HIS version. If making this hat for a man – use the 41-peg loom.
Sky is the limit.
Loom Knit Hat – Belt Loop Video
==================================================================
Related Posts
Tagged: free patterns, hat, hat patterns










Very nice work. Thanks for sharing.
You are VERY welcome and Thanks for the Thanks !
If knitting on the 41 peg how does the pattern work since it’s not an even number?
Thanks
Loving your site in Nova Scotia, Canada!
Yes – just add an extra knit stitch at the end. I think you’ll be happier with the 41-peg loom over the 36.. let me know how it goes.
I made five of these this weekend. Thanks so much for the easy to understand pattern! One question: the first row of the belt color looks separated from the rest of the belt, if that makes sense. I notice yours doesn’t look like that. Any tips?
When you change colors make sure the stitch is the same (make both Knit stitches instead of a Purl then change then a Knit)
I would like to get the patterns of the loom hats please….
The patterns are FREE on the website. Scroll to the middle of the page. To purchase printable PDF patterns: Click HERE
The hat is lovely. I’d like to make a matching scarf. Do you have any instructions to do a similar belt loop pattern on a long loom? Maybe it’s not possible. Otherwise, would you have a recommendation for something that would match?
Hi Lori – to make a matching scarf on a long loom … only use one rake. I would suggest doing the square pattern only on the edges of the scarf then just use the knit stitch in between.
Hope that helps,
denise
Loved this! Super easy and my niece will love the this hat!
So glad you like it !
denise
can you make one so we can see how its done
Hi Denise, I have made two of the belt loop hats as well as the hat where you demonstrated how to change colors. Your web site is the first site I go to when I need a tutorial for a project I am working on. I found a pattern for an afghan I would like to make and it calls for a 48 peg round loom. The loom kit I have only goes up to 40 pegs and I have not been able to find the 48 peg in any craft store, Would you be able to suggest where I might find this large of a loom? Thank you
Hey Fran… sorry for the delay. First want to let you know that the KK 48-peg loom is actually smaller then your 40 peg loom. It has more pegs because the gauge is smaller. In other words the pegs are closer together. That AWESOME loom is no longer available. I am on the look out all the time…. When or if it ever shows up again – I will buy it and raffle it to my readers.
Hi Denise,
I wanted to say thank you for all your video tutorials. I appreciate the time you took to make all these videos. They are all clear, and easy to follow. I am new to loom knitting and by watching your videos I was able to ,make 13 hats to give away at CHristmas and I just completed the Belt Loop hat. Loved it. Again many thanks. Wishing you and your family a Blessed 2015!
Thank You Molly for all the kind words… really appreciate it !
denise
Hi, I just have a question about doing the double rib stitch on a 41 peg loom. Since you’re supposed to knit two pegs, purl two pegs, etc, what do I do about the odd number?
Hi Maci,
I usually knit the peg.
Hope that helps,
denise
Thanks for the pattern. Can’t wait to give this try. Modern flapper- Love it!
How do I get a printed version of the pattern for the Belt Loop hat? I see you posted them above but I want to print & share. I use an iPad.
Hi Ramona – I don’t create pdf versions of my patterns. Sorry – long story. You will have to print the page. I also use an iPad and you can just copy and paste on the note pad.
denise
Hi Denise, Can you please tell me the type of yarn you used to make the Belt Loop Hat, I see where you show that the hat has a lot of stretch…Would like to purchase this type of yarn…Love All That You Do…Awesome!!! Thanks
Hi Dot, soooo sorry for the delay. Here are the two yarns I used …. Caron: Simply Soft – Medium 4 – Black and …. Lion Brand: Vanna’s Choice – Medium 4 Grey Marble. Remember that it’s important to use two different textures – one smooth and one a bit rough. Its what gives the belt part that buffy look.
Hope that helps
denise
Hi Denise,
I think I have done something wrong with the Purl stitches. I didn’t use the working yarn for the purl rows I used the bottom layer of stitches on the peg. Is that wrong ? Should I have been using the working yarn to Purl?
Hi Terri! So glad you’re taking on this project. This is a really cute hat and the one that seems to be everybody’s favorite. I’m doing a video right now.. have to finish the last parts in order to upload it to my YouTube Channel. I was hoping to have it for this weekend. Well, as to your question – the answer is that you don’t use the bottom layer of stitches for this project. That is done when you are folding the knitting for that type of brim. Here is an example of that brim: Click Here. This hat is different. Hope that answered your question. If not let me know I will detail more.
denise
Is there a video for this particular hat pattern?
Will be by the end of this month. Maybe sooner.
denise
Hello. Did you sew down the loops with a sewing machine or with a yarn needle and yarn?
I used a crochet hook to wrap the strings one by one together and than a yarn needle to secure the loops down. I promised to make the video – it’s just been a bit hectic but I hope to come through with the promise sooooon
your site is amazing learn to your hats i do loom hats just plain and simple
i guess i have more learning to do and more samples to make to learn before i start the real loom hat
thank you for your wonderful site
Thank YOU Diane. Take your time – enjoy your knitting journey one step at a time.
denise
This hat turned out awesome…I would love to post a picture but I am not sure how to do this however I think the directions were perfect and easy enough for even new knitters:D
Thank YOU Kelly for your kind words. I appreciate them more then you can imagine.
denise
When you start the two different colors do you cut and tie the yarn? I am a little lost with the two colors.
Hi Cyndi, no I don’t cut the yarn. I just stretch the yarn over. I have been getting a lot of questions about this hat. Promise to do a video soon.
I just finished the belt loop hat, love it! Not perfect but not bad for my first hat on the loom. Would post a photo but don’t know how. Thanks again! It was fun to make 🙂
You are Very welcome Betty
I knitted this hat yesterday. Loved it. I think I did some mistake on the first round after the color is changed because the light color is visible. But overall, I still love this hat very much. Thanks a lot. Here is my hat http://artcampus.aayisrecipes.com/2013/10/15/belt-loop-hat/
Love the color combination. Thanks so much for sharing !
Do you have the pattern for the Orange hat?
Hi Erika, The orange hat is just a regular loom knit hat made using the e-wrap .. for the pattern : Click Here .. for the Flower Pattern : Click Here
on the belt part of the hat do u cut and tie the second color to the black or do u just leave them separate?
Hi Brittany, first- sorry for the delay in response.
About the change of color. I don’t cut through-out the knitting. Once the yarn is cast-on I just grab the next color and take it to the necessary peg. Unfortunately, that leaves loose fibers inside the hat. I tie these fibers in blocks and then sew them to the hat. Just tidy-up the strings.
A bit hard to give you a good verbal visual on this. I hope to create a video before the December holiday season and explain this pattern – the good, the bad and the ugly. It’s a pretty hat and worth the extra time. Stay tuned.
denise
for the part where u do the belt do u cut the yarn and tie it to the black or do u just leave them separate?
I am wanting to make this for a friend for her baby shower and I was wondering how to make the flower. I don’t have a flower loom and I was wondering if I need it to make the flower. I do have the 4 loom set though and was wondering if I can use the smallest loom to make the flower.
Thanks
Hi Caitlyn, you don’t need the flower loom to make the flower. In fact the orange hat on this link has a flower made with at small 24-peg loom. https://www.loomahat.com/how-to-loom-knit-a-flower . You can use any size round loom – it’s just a matter of how big do you want to make the flower. Hope that helps. 🙂
denise
Thank you so much for the link. It was defiantly helpful. I am almost done with the hat so then it will be onto the flower and I will post pictures. =)
[…] https://www.loomahat.com/loom-knit-hat-belt-loop/ […]
Okay, that is what I ended up doing, I just wasn’t sure if it was quite right! I ended up using Jeannie Phillips’ way of closing the top, but used the same color as the “belt.” It ended up looking really neat for a kid’s hat!
Glad it worked for you Nikol ! – and Jeannie’s technique IS awesome.
Really cute hat! I am still learning, so I wasn’t quite sure, but when you are working on rows 7-12 with the alternating colors, do you stop each color and tie them off like you would if you had run out of yarn every 2 pegs or do you just loop the working yarn that you aren’t using behind the pegs? I tried looping it behind the pegs and the outside of the hat looks great, but the inside looks sort of like it would be easy to snag by accident.
Thanks!
Hey Nikol, If you cut and change colors.. it would be a better finish but it would be A LOT of work. I know what you mean about the inside of the hat. My solution was to sew a few straight lines on the loose loops from the inside of the hat once the hat was finished. It flattens the loops and contains them so they’re less likely to snag. Not sure if you can picture what I’m saying?