The Mock Crochet Hat on an Extra Large Loom
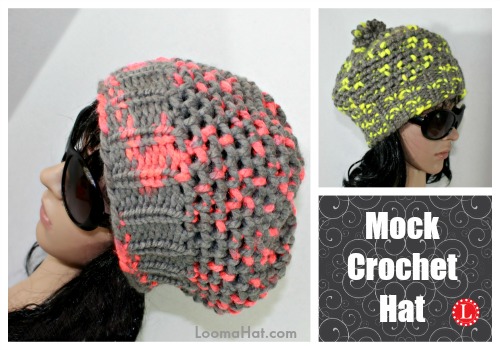
I totally love the look of the Mock Crochet Hat. The stitch has always been among my favorites. It’s like an easy Diamond Lace Stitch. Although it’s pretty simple I’ve posted the pattern along with a step by step video tutorial for us visual learners.
I did change the way Tina Edgar, the creator of the stitch, begins the technique. I think my method is easier especially for beginners. Oddly enough the way Tina starts her stitch is the reason we now have the very awesome Three Step Stitch by Zoey McClean. She thought the beginning of the stitch – was the stitch pattern. Proving that good things can come from mistakes.
Para español: Haz Clic Aquí
Below is the Pattern – Scroll to the Bottom for the Video
Please read the pattern notes and watch the video completely from beginning to the end before starting the project.
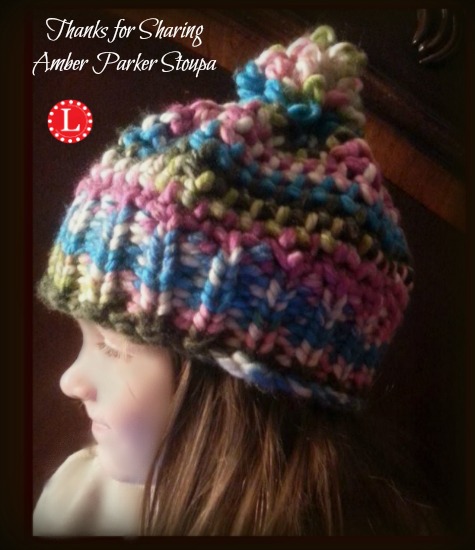
Image Credit: Amber Parker Stoupa – shared on our Facebook page
.
The Pattern: The Mock Crochet Hat
.
Supplies
Loom: Any Extra Large Round Loom. I used the Knifty Knitter Yellow 41-peg Loom
Yarn: Super Bulky #6 . I Used the Lion Brand Wool-Ease in Monarch and Toucan
Hook: Any Loom Hook. I Used a Knifty Knitter with a Rubber Grip
Scissors: Basic scissors. I Used a Westcott Soft Handle
Stitch Counter: Any Type including just paper and pencil. I Used a Hand Tally
Pattern Notes
Make sure you use the correct version of the Knit stitch throughout the pattern. I have used 3 out of the 4 versions , eWrap, Uwrap, and the Flat.
Note: that the Pattern is FREE on this Website. To Purchase a Printable PDF Version: Click HERE
I thank everyone that supports this website through pattern purchases and through Patreon. You make it all possible !
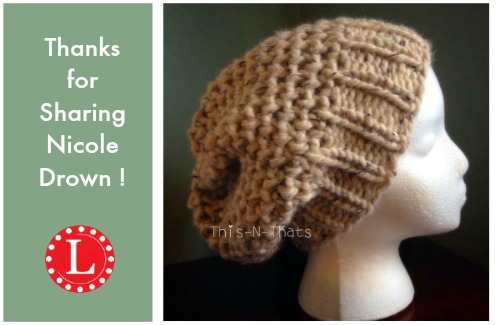
Image Credit: Nicole Drown – shared on our Facebook page. Nicole add more rows for a more slouchy look. Always great to see variations in a pattern. Thanks Nicole for sharing !
Cast-on:
Wrap every peg. Knit each peg using the U-wrap knit stitch.
The Brim: Single Rib Stitch
Rows 1 – 10: Knit 1, Purl 1
The Hat:
Row 11: Knit 2 (Uwrap) , then continue with the Mock Crochet Stitch
Rows 12 – 22: Mock Crochet Stitch
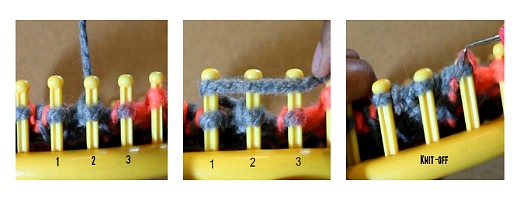
To Do the Mock Crochet Stitch knit the first 2 pegs. Keep in mind that from this point on where ever the working yarn is, that is Peg 2. Take the working yarn from the back to the front wrapping pegs 1, 2 and 3. Using the Flat Knit Stitch – Knit-off the three pegs. Again, where the working yarn is, that is now Peg 2. Repeat the process.
To Decrease the Crown. e-Wrap the first peg, knit-off. Move that loop to the next peg, knit-off. Repeat the same technique until you have gone around the loom. You should have a loop on every other peg. Now you can close the hat.
Close the Hat:
Use the Gathered Method
Make the Pom Pom for the Mock Crochet Hat
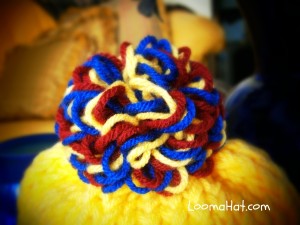
This pom pom is a little different, it was made on a flower loom. Instead of being puffy it’s loopy. If you want to add a loom knit pom pom to you Mock Crochet Stitch Hat: Click HERE
The Video: The Mock Crochet Hat
Please watch the video completely before starting on this project. Although the stitch is easy once you get the hang of it you will feel more confident once you have seen every step necessary to finish the Mock Crochet Hat.
To Subscribe to My YouTube Chanel: Click HERE
For More Stitch Patterns: Click HERE
Related Posts
Tagged: beanie, hat, mock crochet, pattern, slouchy, stitch, video








I want to make this hat for my four year old daughter. Which size loom would I use?
Hi Juana – you can use the 36 peg loom
I agree with the girls on well your video is so clear and easy to follow – I have made 6 hats and will be making more and giving them to the center for the homeless here in town. Thank you so much for this nice pattern.
Addie – Thank you for taking the time to be soooooo super sweet. And more importantly for using your loom knitting skills to show some love to hurting people. I love love love a giver !!!! YOU ARE AWESOME my friend – Big Hugs !!!
I didn’t use this exact pattern but I did the u wrap knit and purl for my brim and e wrapped the rest of the hat. I’m having trouble tightening the loops on the brim after i finish the hat. I noticed that it gets too tight…should I use a bigger loom? I used the orange boye because of the amount of yarn I had on hand.
Yeah – that can happen sometimes – but it’s not the size of the loom. It can be that you used a different cast-on or the yarn tends to frail. Hard to tell unless I have the hat in my hand. I don’t use Boye – so I can’t remember what size that is but for this hat to work on an adult you need the largest of the round looms.
First – i love your videos!! so easy to follow!!!
Second – i have a question that feels dumb but i’m going to ask anyway…
when counting rows does the cast on row count as the first row??? see – it sounds dumb but i just can’t decide. when my project is 1 color i don’t care as much but i am trying to do a pattern and i can’t decide if i should or should not count the cast on as a row.
thanks so much!
Pam sooooooo very sorry for the delay in answering your question – First – the dumb question is the one you didn’t ask – remember that one from school …LOL. THANK YOU for asking for all those that did not and to help me update the pattern.
The answer is NO… you do not count the cast on as row 1. Hope the update to the pattern helps
How many yards do you need to complete this?
From 100 – 120 depending on how long you want the hat
I just followed your tutorial and it was awesome! Made this hat and now know new stitches and how to tighten the brim! Thank you so much!
You are VERY welcome!
Denise, I don’t know what I’m doing wrong when making the mock stitch but the loop is really hard to pull over. Do you have any suggestions to making this easier?
Hi Peggy,
When you’re wrapping pegs 1,2 and 3 . turn the yarn inward – like you would be “half” wrapping the peg – Like a U-wrap knit stitch. That adds more length to the working yarn and makes the stitch looser.
Hope that helps
I’ve been doing that, Denise but some of them are really hard to pull over & some aren’t. Thanks for your help.
I understand your difficulty. My solution is to wrap the three pegs very loose, then after knitting each peg loosen the loop that will remain on the peg. Yes, this takes extra time but once you’ve made your way completely around the loom, every peg should have a loop that is easier to knit and there will be less chance of breaking/stretching the yarn.
Denise, I had another question for you. In your video you say to do the mock crochet stitch for 12 rows but in your instructions it say 12-22 rows so was wondering which one was correct?
Thanks.
Sorry about that Peggy – it’s 12 rows
Thank you, Denise
She means that you do the mock crochet stitch on rows 12 thru 24. 😉
Would this stitch work on a flat panel like a scarf? I love this stitch and it’s easy to follow in a circle but don’t know how you would start the rows if it were flat. I have been loom knitting almost a year and you have been a great inspiration and so helpful. If only I could master tightening the bottom edge of a hat. You make it look so easy but I haven’t had much success yet 🙂
Yes it works GREAT as a scarf – here is a link to the original pattern which was for a baby blanket – just use less stitches: Click HERE
As for the tight edges practice on a small loom with baby hats – practice really does make perfect.
thanks for the pattern
You’re welcome !
thank you love your hat
When you k1 p1 on a 41 peg loom you will have 2 of the same stitch at the end.
Yes, that’s correct. I do mention that on the video
I am working on the hat now. Hope it turns out as well as yours :/
It will- just remember to use thick yarn and follow the pattern 🙂
You do such a great job with your videos. You speak clearly and never an “ah” like so many speakers interject every other word when speaking. Your speech is at a pace that I don’t have to rewind to understand what you are saying. Such a pleasure! The projects are fun. Just great instructions from some who is a professional. Please never leave us- you are a treasure.
what in the world do you do with all your hats… LOL
Thank you for ALL your kind words – they are very much appreciated. As for the hats – many are donated, put into my Operation Christmas Child Shoeboxes and a few are sold on my Etsy store.
Hi, I tried copying the free pattern, and I’m getting message it is protected and can not copy. Am I doing something wrong.
Hi Tina, my patterns can only be viewed on the website. Printable versions have to be purchased through Crafty or Etsy. My patrons on Patreon can download very pattern I have made for the month for a minimum support of $2.00 or more per month.
Hi Denise, I love the mock crochet stitch. Can this stitch be done on any size loom & peg # ? The large loom u used has 48 pegs, I have a 31 peg loom by loops & threads I would like to use.
Hi Sheila, that was a boo-boo .. what I used was a 41-peg loom. Loops & Thread includes a 41-peg. You can use any size loom and any weight yarn. But with 31-peg you will get a baby hat.
I just got some new variegated yard and today saw this video. I am so excited to start a new hat. Also, thanks for the pom pom because I did not know how to make those. this hat will make a lovely Christmas gift for my granddaughter! Thanks!
Thanks for the Thanks Paulette – I really appreciate it. So glad you like the pattern !